 Day One Fixes
SolvedHow-toUpdated 2026-11-04
Stardew Valley 100% Achievement Guide
Short answer
An achievement that empowers those who earn it. The flavor is like a dream... a powerful personal experience, yet difficult to describe to others.
Steam Community guide by ponkberry.
Disclaimer
Also, many images are taken from stardewvalleywiki.com so their work is most definitely appreciated.
Many thanks to the modding community over at ChuckleFish for pushing out a script to extract various files for information.
Note: I do have a web based version of this guide up here.
https://htonyn.github.io/stardew-valley/
Permanent Choices
Farm Type
In Update 1.1, Stardew Valley introduces new farm types that each specialize in their own biome. Each corresponds to a skill group:
Standard Farm: Best for Farming
Riverland Farm: Best for Fishing
Forest Farm: Best for Foraging
Hill-top Farm: Best for Mining
Wilderness Farm: Best for Combat
If you're starting this game for the first time, I would highly recommend going with the Standard Farm. It's the most balanced version and probably the easiest to play with.
Mutually Exclusive Achievement
Also introduced in Update 1.1 is a large fix regarding the two end-game like achievements: Local Legend and Joja Co. Member of the Year.
Prior to this update, if you gained progress in both routes, you would miss both achievements. This has been fixed so that you are guaranteed at least one ending. As such, you can now mix and match completing bundles in the community center as well as purchasing upgrades through the Joja Membership.
Now, these achievements REMAIN mutually exclusive, so it is still impossible to obtain them in a single playthrough without reloading an older save after completing one.
Summary
- If you want to do the Joja route, make sure you do not finish the community center with a bundle.
- If you want to do the Local Legend route, make sure you do not buy the last upgrade in the Joja shop.
- If you want both, then back up a save near the end, complete a route, then reload and do a different route.
Skills
There are 5 different skills overall: Farming, Foraging, Mining, Fishing, and Combat. Each skill has two different professions that are made available at level 5. You can ONLY pick one of them. Then each profession has two specializations that is given at level 10. Again, you can ONLY pick one.
See Master of the Five Ways for more details on skills
My Preference
Farming: Tiller -> Artisan (for Legend achievement)
Foraging: Gatherer -> Tracker (for Complete Collection achievement)
Mining: Geologist -> Excavator (for Complete Collection achievement)
Fishing: Fisher -> Pirate (for Complete Collection achievement)
Combat: Fighter -> Brute (Playstyle)
The Farm Cave
When you reach 25,000g earned, Demetrius will show up at your door proposing using your cave for one of two things: Mushrooms or Bats.
Mushrooms
Grows all the mushrooms in your cave at random in 6 given mushroom plots
Bats
Fruitbats randomly leave fruits (regardless of season) in the cave.
Which to pick?
If your only goal is to simply complete the Community Center bundles, then I'd pick the fruitbats because planting saps could prove expensive and only grows during specific seasons. But the yields on trees are much better than mushrooms.
If you're going for the perfect setup, I'd pick mushrooms. Fruit trees bare 1 fruit every day as long as you're in season, and you don't have to regrow these trees. Mushrooms on the other hand, are grown primarily in the cave, and the secret woods.
Spring
Crops
CauliflowerGreen BeansKaleParsnipPotatoStrawberry (Egg Festival)Rhubarb (Oasis)Coffee Bean (Traveling Cart)Garlic (Year 2)Coffee BeanUnmilled RiceCarrotOn Spring 13, the Egg Festival takes place in town. There is a booth that sells Strawberry Seeds for 100g each.Whenever you fix the bus, you will gain access to the Oasis as well as the shop there. That's how you purchase Rhubarb Seeds.Every Friday & Sunday, the Traveling Cart will be located in the area south of your farm, known as Cindersap Forest. It'll be situated just above the lake here. Its inventory is randomized, so it has a chance of selling Coffee Beans at 2500g. Beans also drop from Dust Sprites at a 2% rate on Floors 40-79.Garlic is a common crop, but only available on Year 2 and after. Sold at both Joja Mart and Pierre's General Store.Coffee Bean is a common crop, but only available on Year 2 and after. Sold at both Joja Mart and Pierre's General Store. Also grows in Summer.Unmilled Rice is a common crop, but only available on Year 2 and after. Sold at both Joja Mart and Pierre's General Store.Carrot can be obtained from the Raccoon Wife, see Good Neighbor quest in 1.6
Flowers
TulipBlue Jazz
Fruits
ApricotCherry
Foraging
Wild HorseradishDaffodilLeekDandelionSpring Onion (Cindersap Forest)Common MushroomMorelSalmonberry
Fishing
AnchovySardineHerringEelHalibutSmallmouth BassSunfishShadCatfishLegend
Summer
Crops
BlueberryCornHopsHot PepperMelonRadishTomatoWheatStarfruit (Oasis)Red Cabbage (Year 2)Coffee Bean (Year 2)Summer SquashWhenever you fix the bus, you will gain access to the Oasis as well as the shop there. That's how you purchase Starfruit Seeds.Red Cabbage is a common crop, but only available on Year 2 and after. Sold at both Joja Mart and Pierre's General Store.Coffee Beans are available in Year 2 from Pierre's and Joja Mart. Also grows in Spring.Summer Squash can be obtained from the Raccoon Wife, see Good Neighbor quest in 1.6
Flowers
PoppySummer SpangleSunflower
Fruits
OrangePeach
Foraging
Spice BerrySweet PeaFiddlehead FernRed MushroomGrapeRainbow Shell
Fishing
PufferfishTunaRed MulletOctopusSuper CucumberTilapiaHalibutRed SnapperDoradoSunfishShadPikeRainbow TroutCatfish (Secret Woods)Crimsonfish
Fall
Crops
AmaranthBok ChoyCranberriesEggplantGrapePumpkinYamBeet (Oasis)Rare Seed (Traveling Cart)Artichoke (Year 2)BroccoliWhenever you fix the bus, you will gain access to the Oasis as well as the shop there. That's how you purchase Beet Seeds.Every Friday & Sunday, the Traveling Cart will be located in the area south of your farm, known as Cindersap Forest. It'll be situated just above the lake here. Its inventory is randomized, so it has a chance of selling the Rare Seed for 1000g.Artichoke is a common crop, but only available on Year 2 and after. Sold at both Joja Mart and Pierre's General Store.Broccoli can be obtained from the Raccoon Wife, see Good Neighbor quest in 1.6
Flowers
Fairy Rose
Fruits
ApplePomegranate
Foraging
HazelnutCommon MushroomChanterelleBlackberryWild Plum
Fishing
AnchovySardineEelRed SnapperSea CucumberTilapiaAlbacoreSmallmouth BassSalmonTiger TroutWalleyeCatfishAngler
Winter
Farming
PowdermelonPowdermelon can be obtained from the Raccoon Wife, see Good Neighbor quest in 1.6
Flowers
N/A
Fruits
N/A
Foraging
Winter RootSnow YamCrocusHollyCrystal Fruit
Fishing
TunaSardineRed MulletHerringSquidSea CucumberAlbacoreHalibutTiger TroutPikePerchLingcodGlacierfish
Magical Construction Questline
This unlocks two new areas that have fishing related to them for the fishing achievement. Other than that, it unlocks new buildings.
Step 1: Complete Joja route or Community Center route.
- You can do either one, but this needs to be done to access this questline. So either you earned the Local Legend achievement, or the Joja Co. Member of the Year achievement.
Step 2: Visit the Railroad area for a Cutscene - Here you will get a cutscene with the Wizard regarding his Magic Ink. In order to remove the seal to enter, you must have the Dark Talisman.
Step 3: Retrieving the Dark Talisman - Visit Krobus who resides in the Sewers. In order to access the sewer, you must have turned in enough artifacts to the library.
- Krobus will unlock a new area, Mutant Bug Lair, that contains a chest at the end with the Dark Talisman.
- This new area has waters containing the Slimejack fish.
Step 4: Witch Swamp - Returning to the Railroad area with the Dark Talisman, you can remove the seal. Enter the cavern and you'll be at the Swamp. Now, you can fish here for the final new fish: Void Salmon
- A goblin will prevent you from passing him. You need a Void Mayonnaise to move him. Void Egg + Mayonnaise Machine.
- Enter the house, the ink on the left table. Return to the Wizard's Tower, the red seal on the ground will teleport you there.
Ginger Island
Access
Upon completion of the third community bundle, visiting Willy's Fish Shop will trigger a cutscene where he reveals that restoring the Community Center will unlock something.
After you've restored the Community Center, you'll get a letter from Willy to visit the Fish Shop again. This time, enter the back room to see a cutscene with the boat.
Repair the Boat
- 200 Hardwood
- 5 Iridium Bar
- 5 Battery Pack
Unlocking Qi's Walnut Room
For specifics on how to progress, feel free to use the following links. For achievements, you're going to need to collect 100 of 130 golden walnuts in order to unlock Qi's Walnut Room in order to obtain Qi Gems.
https://stardewvalleywiki.com/Ginger_Island
https://stardewvalleywiki.com/Golden_Walnut
Qi's Walnut Room
You'll need to complete tasks on the board in order to obtain Qi Gems. You can also trade extra golden walnuts for these, but at a poor 1:2 ratio. What you're really focused on here are the recipes.
Radioactive Material
The request board in Qi's Walnut Room will have two similar quests:
- Danger in the Deep for hardmode mines in the Mountains
- Skull Cavern Invasion for hardmode mines in the Skull Caverns
These quests will enable a separate mode for the adventure areas and will also introduce new mining nodes for radioactive ore. These ores do not spawn on floors of multiples of 5.
For the mines, once you've reached Floor 120, there will be a Shrine of Challenge on Floor 120 that you can toggle the dangerous mod.
Perfection Tracker Statue
FYI: There's a statue here that tracks your completion of the game.
https://stardewcommunitywiki.com/Perfection
A Big Help - Help Requests
Gofer
Complete 10 'Help Wanted' requests.
A Big Help
Complete 40 'Help Wanted' requests.
If you go to Pierre's Shop, there are two things in front of his store.


- A Calendar showing all birthdays of people you know, and festival dates
- Help Request
Each help request is only available on that particular day, and the delivery time only spans 2 days. So you get the current day, and the next day to complete the delivery until it disappears.
Complete 40 of these to get the achievement. As far as I know, there are no counters that you can check naturally to figure out your progress.
Tip: For Clint's copper ores, and Willy's fish requests, it requires you to ACQUIRE new items as opposed to 'giving' them the items. So those items must be obtained after accepting their request. Acquire simply means it needs to be newly introduced to your inventory so dropping it and picking it back up is valid.
Complete Collection - Museum | Minerals
Treasure Trove
Donate 40 different items to the museum.
A Complete Collection
Complete the museum collection.
Note: There are more slots in the museum than there are artifacts, so do not worry about that.
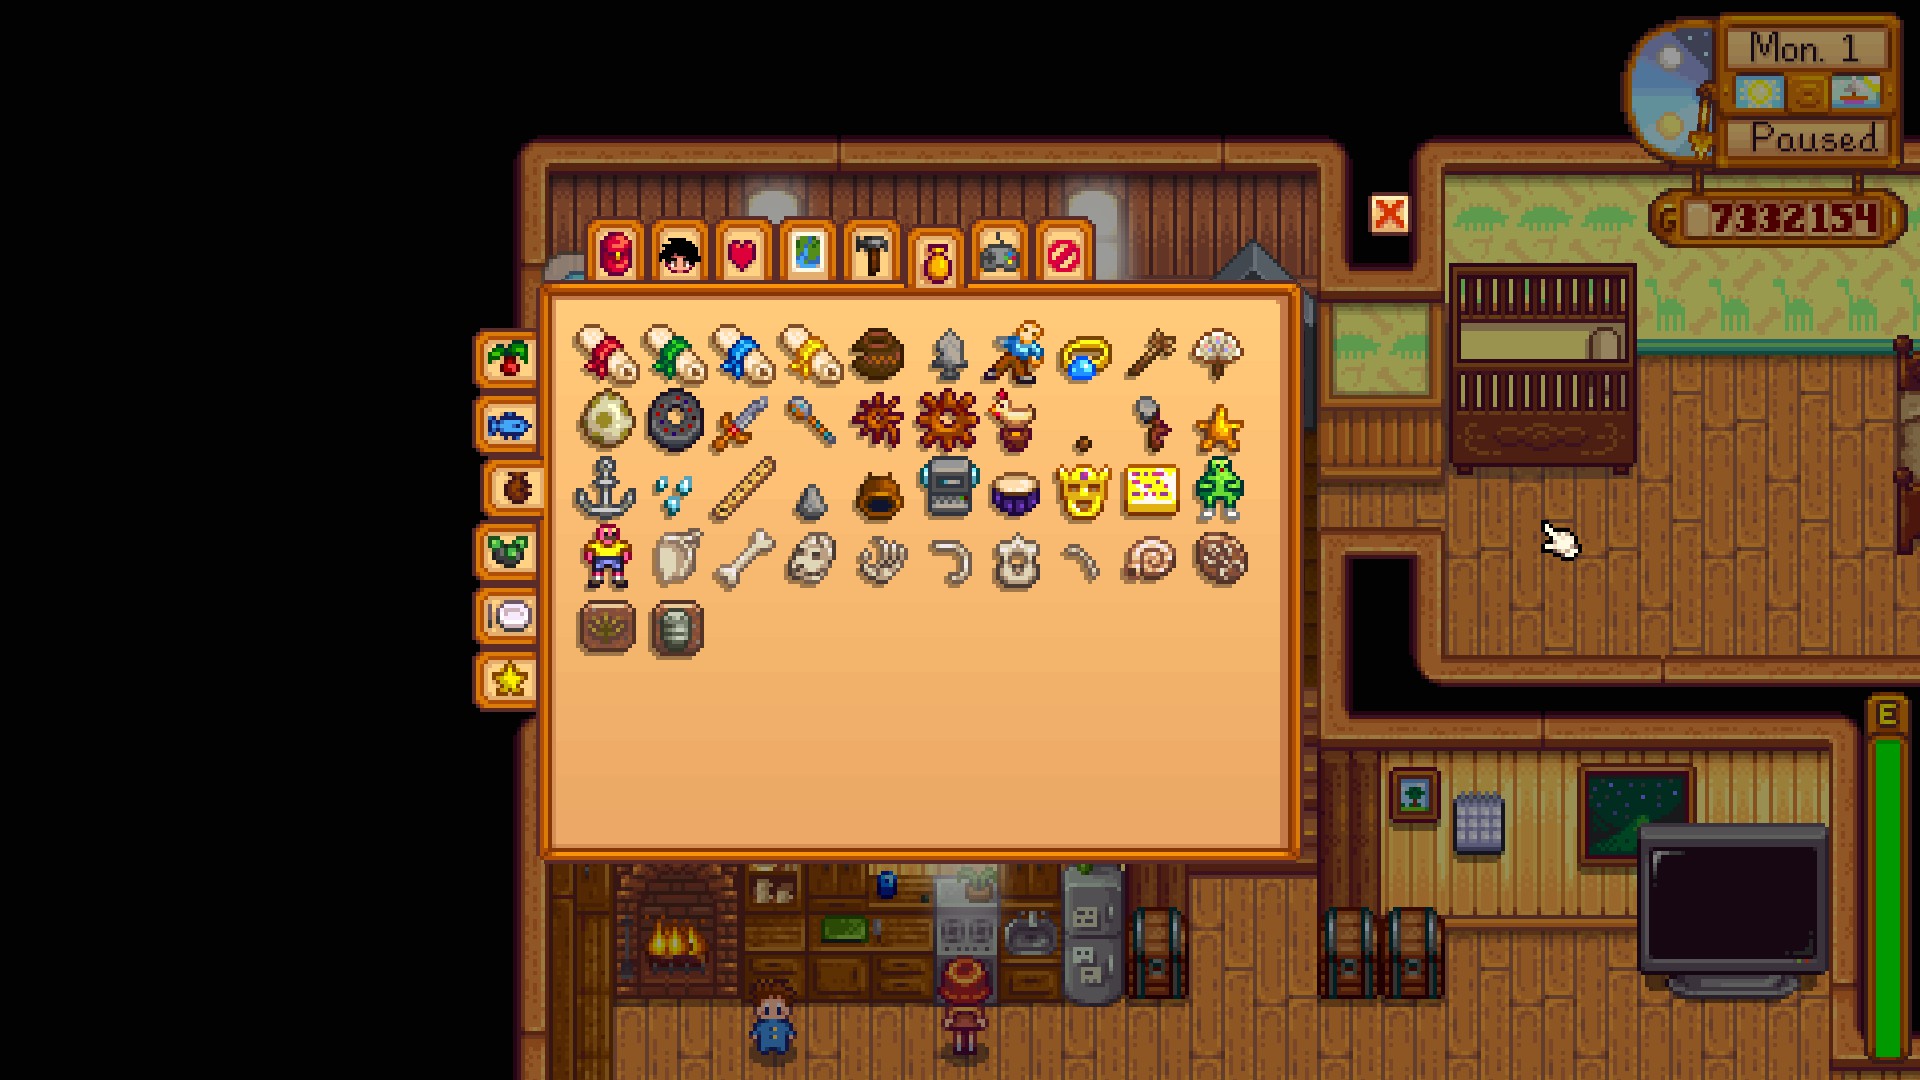
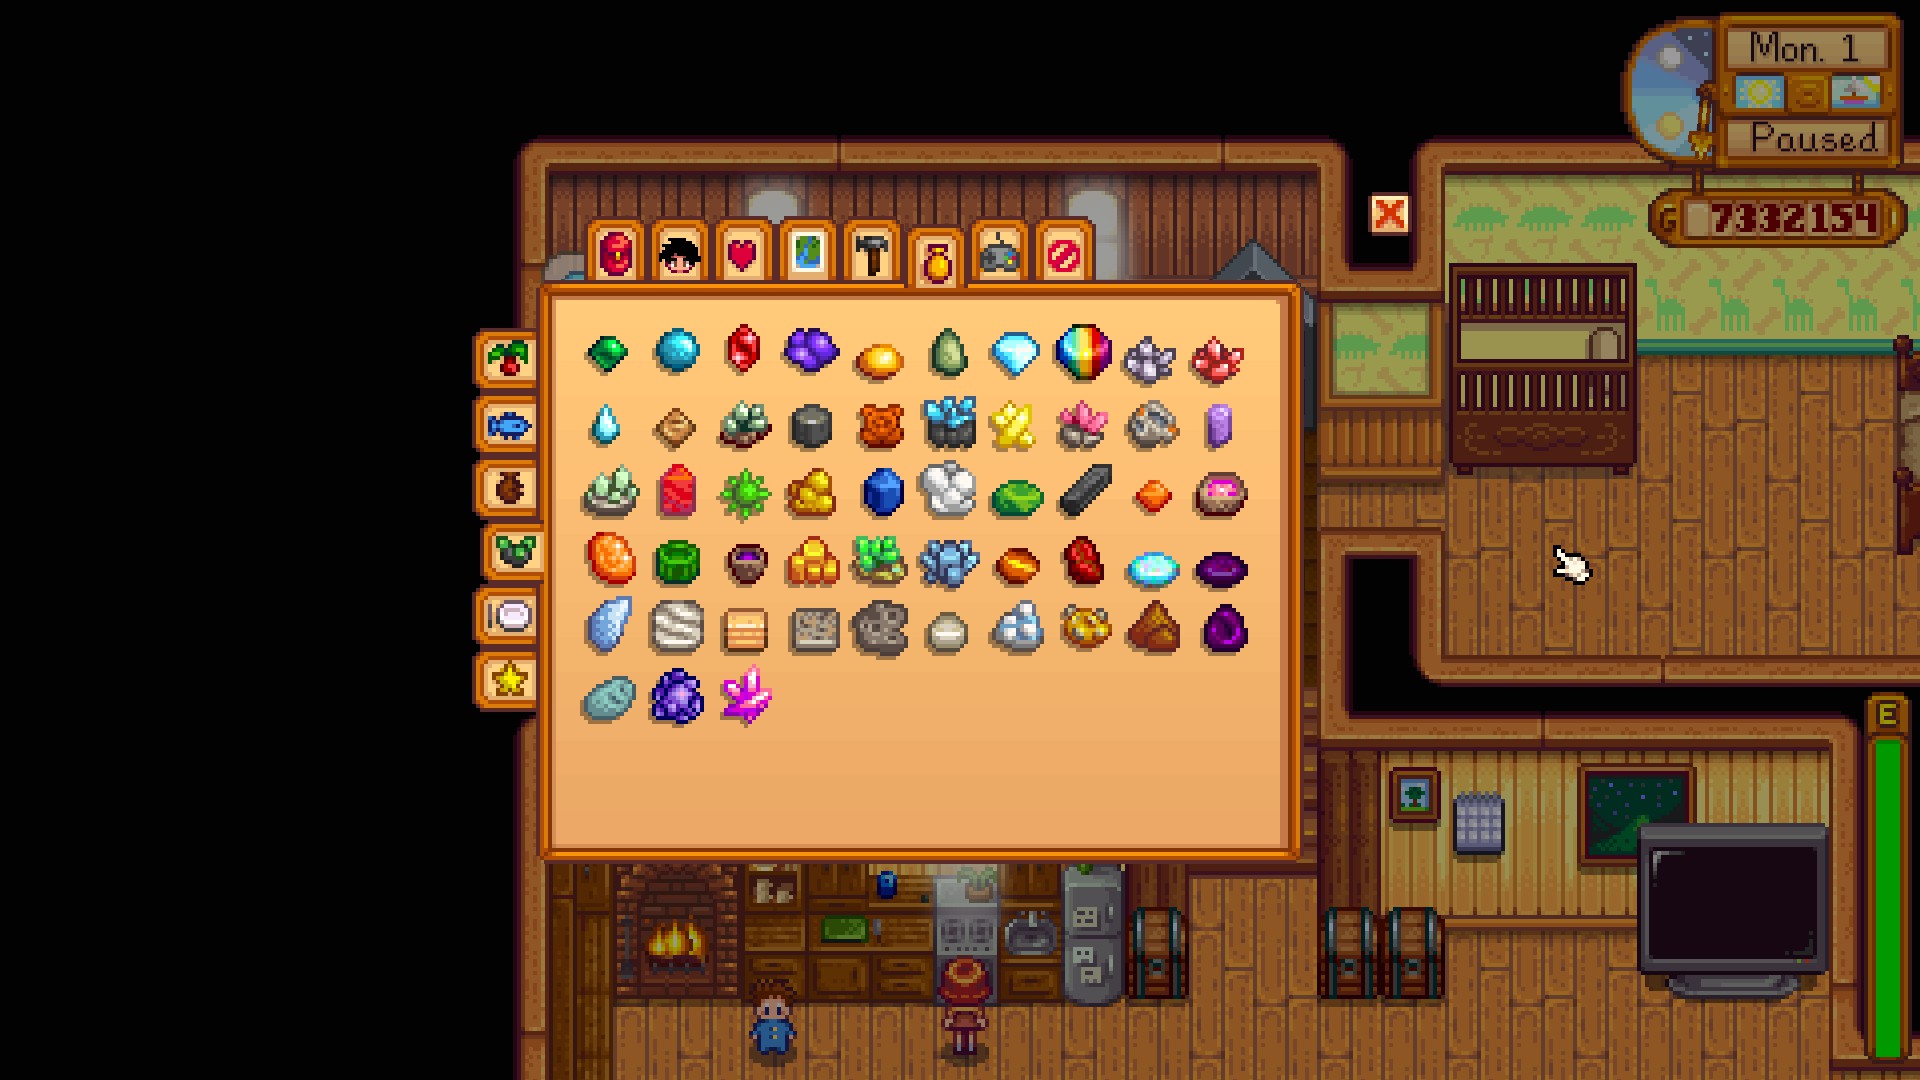
There are 53 Minerals, and 42 Artifacts in the game to find. Minerals are either found as nodes in the Mines, Skull Cavern, or at the Quarry.
Artifacts can be obtained through using a hoe on the ground specifically on top of worms. The area you're at will determine what you get. Then the rest are item drops via monsters.


Mineral
MineralLocation
EmeraldMines | Panning
AquamarineMines | Panning | Fishing
RubyMines | Panning
AmethystMines | Panning
TopazMines | Panning
JadeMines | Panning
DiamondMines | Panning
Prismatic ShardIridium Node | Mystic Stone | Omni
QuartzMines
Fire QuartzMines
Frozen TearMines
Earth CrystalMines
AlamiteGeode | Omni
BixiteMagma | Omni
BaryteMagma | Omni
AeriniteFrozen | Omni
CalciteGeode | Omni
DolomiteMagma | Omni
EsperiteFrozen | Omni
FluorapatiteFrozen | Omni
GeminiteFrozen | Omni
HelviteMagma | Omni
JamboriteGeode | Omni
JagoiteGeode | Omni
KyaniteFrozen | Omni
LunariteFrozen | Omni
MalachiteGeode | Omni
NeptuniteMagma | Omni
Lemon StoneMagma | Omni
NekoiteGeode | Omni
OrpimentGeode | Omni
Petrified SlimeGeode | Omni
Thunder EggGeode | Omni
PyriteFrozen | Omni
Ocean StoneFrozen | Omni
Ghost CrystalFrozen | Omni
TigerseyeMagma | Omni
JasperMagma | Omni
OpalFrozen | Omni
Fire OpalMagma | Omni
CelestineGeode | Omni
MarbleFrozen | Omni
SandstoneGeode | Omni
GraniteGeode | Omni
BasaltMagma | Omni
LimestoneGeode | Omni
SoapstoneFrozen | Omni
HematiteFrozen | Omni
MudstoneGeode | Omni
ObsidianMagma | Omni
SlateGeode | Omni
Fairy StoneFrozen | Omni
Star ShardsMagma | Omni


Complete Collection - Museum | Artifacts
Now, digging for artifacts will most likely result in the most difficult of challenges. This is why in the first section, I highly recommend using the Tracker specialization for Forager. This specialization will throw arrows on the edge of your map that points towards ANYTHING that is forageable. That includes random fruits laying out, or worms on the ground. It's much more efficient to simply clear out all the forageable markers, then move to the next area.
Foraging: Gatherer --> Tracker
ArtifactLocation
Dwarf Scroll IMines: All Monster Drops
Dwarf Scroll IIMines: Frost Bats | Dust Sprite | Secret Wood: Blue Slimes
Dwarf Scroll IIIMines: Floor 40+ | Lava Bats | Skull Cavern
Dwarf Scroll IVMines: A