 Day One Fixes
SolvedHow-toUpdated
FINAL FANTASY RESONANCE 100% Walkthrough
Short answer
What This Guide Will Cover: Complete Walkthrough – Step-by-step story progression. All items as well as all Achievements
Steam Community guide by Batil.
FINAL FANTASY RESONANCE
FINAL FANTASY RESONANCE | Complete Walkthrough & 100% Completion Guide WIP
Welcome to my FINAL FANTASY RESONANCE Complete Walkthrough & Completion Guide!
This is very much a work in progress. Will be continuing to format, add images etc.
This guide is designed to help you experience everything the game has to offer, from the opening chapter to the final battle and beyond. I hope everyone is as excited to play this as I am! i'm just a FF Fan that's helping the community lol
Whether you're playing for the first time or aiming for 100% completion, you'll find clearly organized walkthroughs, collectible locations, enemy information, boss strategies, and helpful tips throughout your adventure.
What This Guide Covers
- Complete Story Walkthrough - Step-by-step progression through every documented chapter and major location.
- Treasure Chests & Hidden Items - Locations of equipment, valuables, and hidden rewards.
- Collectibles & Secrets - Tablet Shards, Visions, hidden areas, and other discoveries.
- Side Quests & Optional Content - Quest objectives, rewards, optional activities, and encounters.
- Boss Strategies - Recommended preparations, weaknesses, attack patterns, and battle strategies.
- Complete Bestiary - Documented enemy locations, HP, elemental weaknesses, resistances, and rewards.
- Equipment & Abilities - Weapons, armor, accessories, abilities, and useful character setups.
- Achievements & Completion - Achievement requirements and completion checklists.
- Missables & Points of No Return - Important warnings to help prevent permanently missed content.
How to Use This Guide
The main walkthrough is organized in chronological story order. Optional activities, collectibles, and important treasure locations are included at the points where they become available.
Additional reference sections provide quick access to boss strategies, enemy information, equipment, collectibles, and achievements.
Select a chapter below to jump directly to its walkthrough. Each chapter includes step-by-step progression, treasure locations, Tablet Shards, Visions, Espers, boss strategies, side quests, achievements, and completion checklists.
ChapterWalkthroughChapter 1Tailing the TruthChapter 2Eternal BlueChapter 3Wardens of the AquapolisChapter 4Banner OathChapter 5Scars of TimeChapter 6Tranquility
Spoiler Warning
WARNING: This guide contains story spoilers, boss information, hidden locations, and details about optional content throughout FINAL FANTASY RESONANCE.
Good Luck & Enjoy the Adventure!
This guide is very much a Work in Progress. If I get anything wrong or you would like to contribute, let me know!!
More updates coming! Found an error? Let me know in the comments.
[/quote]
CHAPTER 1: TAILING THE TRUTH
Quick-Reference: The Route
OrderAreaDo not leave without1Earth Shrine2 outdoor chests, 6 dungeon chests, Nodachi, Bulletproof Vest, Belmodar2Town of Mitra5 chests, Rain's 200 gil, Tronn + Leah3Burning Grandshelt CastleCourtyard and interior loot, Black Garb, Hell's Rider, Umbra sequence4Royal CapitalTablet Shard #1, 3 chests, 2 NPC gifts, start Dream of an Idealist5Village of KolShard #2, 2 chests, finish Idealist, Warrior of Light6Felicitas and Kolobos overworldShards #3–4, 4 chests, 3 core samples, Terra, Secrets Unearthed7Kolobos RuinsShards #5–6, 4 chests, The Hunger two-phase boss8Grandport HarborShards #7–8, 2 chests, The Weight of Mercy, first palace rewards9Siren's TowerShards #9–11, 6 obtainable chests, Citrine Pot, Gilgamesh, Siren10Grandport returnMagicite awakening, Rear Support, Ahoy!, palace reward #311Eastern desert and cavesCloud, Cavern of Swords Shard #12, Marauder, palace reward #412Grandport docksFinal checklist, save, board ship to finish Chapter 1
1.1 Grandshelt Castle Prologue and Earth Shrine
Our first real job as Rain is checking on the Earth Crystal. Nothing ominous about that. We'll clear the shrine, collect every chest, and make sure we don't walk past the first two world-map pickups on our way to Mitra.
Collection Targets: 8 Earth Shrine chests (2 outside, 6 inside), Potion and Antidote Herb x2 on the world map, and Rain's permanent stat choice.
Tablet Shards: None yet.
Grandshelt Castle and Earth Shrine Entrance
1. Finish the opening tutorial and take control of Rain in Grandshelt Castle. Save at the nearby Save Point, follow the hall west, and take the stairs down to the exit. There are no documented collectibles along this starting stretch.
2. At the Earth Shrine, Rain gets a dialogue choice that permanently boosts one of his stats:
- "I'll take point. Follow my lead.": Strength +3
- "We're only here to check that everything is in order...": Stamina +3
- "Cohesion is key.": Spirit +3
I'd take Strength +3 for a little more damage, but any choice works. The story continues the same way.
3. Outside the shrine, the left guard heals you for free and the right guard sells items. Save at the entrance before going farther.
4. Open the two chests to the right of the entrance Save Point for a Potion and an Ether. That's both outdoor chests.
Earth Shrine: All Six Interior Chests
5. Enter the main hall, head right (east), and descend the stairs. Before following the lower route onward, detour down the northwestern staircase to a short dead end. Open the chest for a Phoenix Down, then return.
6. Continue down the next stairs and follow the path around. Near the large staircase, take the narrow passage to the right (east). The chest at its end contains Nodachi, an early weapon upgrade for Lasswell.
7. Backtrack to the large fallen pillar and climb the nearby stairs. On the upper route, look for the broken ramp leading south to a concealed lower section. Open its chest for Flame Scroll I x2, then climb back up. Save those scrolls for Belmodar if you need extra Fire damage.
8. Stay on the main path but skip the northern boss route for now. Take the eastern side passage into a chamber containing three chests:
- Potion x3
- Bulletproof Vest
- 400 gil
All six interior chests are now accounted for, bringing our Earth Shrine total to 8/8. Equip the Bulletproof Vest on Rain or Lasswell.
Belmodar and the Earth Crystal
9. Return to the main route and take the northern stairs to the Save Point outside the Crystal Chamber. Use the Teleport option to return to the shrine entrance for a free heal, then teleport back if needed.
10. Continue toward the Crystal Chamber entrance to fight Belmodar.
BOSS: Belmodar | Earth Shrine
Battle infoDetailsType / LevelBeast / Lv. 4HP / Stagger2,000 / 145 (Normal reference)WeaknessFire, DarkResistanceLightning damage halvedBig threatThwack, a powerful multi-hit physical attack
Loot & Battle Rewards
Reward typeWhat you getNotesEXP300Published base; results may varyGil750Published base; results may varyNormal dropPhoenix DownBoss dropStealNone listedNo obtainable steal documented
How to handle the fight
- Have Rain cast Fire to exploit Belmodar's weakness and reduce its Stagger Gauge.
- Use Lasswell's Dawn Frost to help work down the gauge, and save your Flame Scrolls for extra damage if needed.
- When Belmodar glows red and a devastating attack is coming, try to stagger it before its turn. Otherwise, Defend.
- After the stagger, unload your strongest attacks during the bonus phase. Keep Potions ready and avoid running Rain completely out of MP.
To Mitra: Two Separate Overworld Sparkles
11. Defeat Belmodar and watch the Crystal Chamber scenes. You'll eventually return to the shrine entrance with the objective Go to the town of Mitra. Save before leaving.
12. Outside on the world map, collect two different sparkles along the route to Mitra:
- Potion: Immediately outside the Earth Shrine entrance.
- Antidote Herb x2: Beneath the bridge along the route toward Mitra. Check underneath the bridge before entering town.
IMPORTANT: These herbs are not the Antidote Herb x2 sparkle found on the later route from Mitra to Grandshelt in Section 1.3A. They are two different world-map pickups, and we're collecting both.
13. Once you've collected both sparkles, follow the story marker into Town of Mitra.
Section 1.1 Completion Check
- Rain's permanent stat choice made.
- 8/8 Earth Shrine chests opened: Potion, Ether, Phoenix Down, Nodachi, Flame Scroll I x2, Potion x3, Bulletproof Vest, 400 gil.
- 2 world-map sparkles collected: Potion and Antidote Herb x2.
- Belmodar defeated; Earth Crystal scenes completed.
- Tablet Shards: 0/99.
Next: 1.2. Town of Mitra: First Two Visions.
1.2 Town of Mitra: First Two Visions
Mitra is our first proper shopping-and-looting stop. Do yourself a favor and make one sweep of town before continuing Rain's story. Future-you will appreciate it.
Mitra treasure: 5 chests + 1 hidden pickup (200 gil).
1. After entering Mitra, head south toward the waterfront. Follow the docks to the southernmost pier and open the chest for Phoenix Down ×3. Three revives this early? We'll happily take those.
2. Head back toward the eastern side of town and find the house with a gated garden. Enter through its front door, then leave through the other door to reach the backyard. Open the chest for an Ether.
3. Make your way to the Inn. There's a hidden route around the back that leads to its rear entrance. Follow it inside to reach the chest containing a Tent. Don't mistake the normal front entrance for the route to this treasure.
4. Continue toward the northeastern corner of Mitra. Find the house with a Chocobo in its garden. Enter the house and use the exit leading into the garden. Open the chest beside the Chocobo for a Phoenix Down.
5. Head up toward the northwestern weapon and armor shop. Before entering, walk left of the shop to reveal a narrow hidden passage. Follow it to the chest containing another Ether.
That's all five town chests. Here's a quick checklist before we start spending money.
Mitra locationTreasureSouthernmost pierPhoenix Down ×3Garden behind eastern gated houseEtherHidden rear entrance of InnTentNortheastern Chocobo gardenPhoenix DownHidden path left of northwest weapon shopEtherCabinet beside bed in Rain's house200 gil (hidden interaction)
6. Now that we've robbed every unattended treasure chest in town, let's do some legitimate shopping.
Recommended equipment upgrades:
- Bronze Sword (350 gil): A solid early upgrade for Rain, offering 28 Physical Attack and 13 Magic Attack.
- Uchigatana (350 gil): A physical upgrade for Lasswell with 24 Physical Attack and 17 Magic Attack.
- Bronze Chestplate (300 gil): Offers 24 Physical Defense and 22 Magic Defense. Consider buying one for each character.
- Hairband (200 gil): An accessory offering +5 Physical Defense. Give it to whoever isn't using the Bulletproof Vest from the Earth Shrine.
Nodachi or Uchigatana? The Nodachi we found earlier has 21 Physical Attack and 20 Magic Attack. Uchigatana improves physical damage to 24 but lowers Magic Attack to 17.
I prefer Uchigatana for Lasswell's physical attacks and Dawn Frost, but keep Nodachi if you're leaning more heavily into magic.
If gil is tight, prioritize your weapon upgrades and whatever armor you can afford. No need to empty your wallet just because a merchant has shiny things.
7. Once you're finished shopping, head to Rain's house near the northern end of town. It's the house with the distinctive blue roof.
After the story scene, explore the house before investigating the mysterious door.
Check the cabinet beside the bed toward the upper part of the house. Rain apparently left 200 gil tucked away inside.
It's his money, technically. We're just helping him remember where he put it.
8. Now investigate the arched wooden door in the upper-left corner of Rain's house, just left of the bedroom area.
Lasswell will recognize the door and the story will advance. Head inside and follow the long passage north until you reach the strange chamber beyond.
Continue through the scenes in the Farplane and approach the Vision Crystals.
9. After the scenes with the Will of Light, you'll receive your first two Visions:

Black Mage Tronn | Breaker
Grants Fire, Blizzard, Thunder, and Blind. His starting passives include Stagger Power +30% and MP +10%. Excellent for elemental damage and breaking stagger gauges.
White Mage Leah | Medic
Grants Cure, Shell, Libra, and Banish. Her starting passives include Healing Magic +30% and Nullify Charm, which will be especially useful against Siren later.
You receive BOTH Visions. There's no permanent choice here, and you can swap them between characters whenever you want.
10. When the game gives you the objective "Equip a vision", open the main menu and navigate to:
Equipment & Abilities → Select Character → Visions
Choose a Vision from the available list and equip it. Repeat for your second character.
My recommended starting setup:

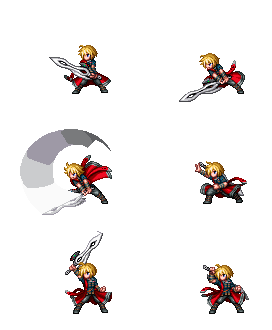
- Rain → Leah: Gives Rain healing and Light magic. His defensive role makes him a useful character to keep the party alive.
- Lasswell → Tronn: Adds offensive elemental magic and stagger-focused abilities to your main breaker.
This setup gives us access to healing, Fire, Ice, Lightning, and Light damage between our two characters.
Don't worry about getting everything perfect. Visions can be reassigned, so experiment as your party grows.
11. Take a moment to look through the Vision Details screen.
Each Vision has two important progression systems: - Awakening Level: Unlocks additional spells, skills, and passives using Magicite.
- Mastery Rank (MR): Increases as characters earn Mastery Points (MRP) in battle while using a Vision. Higher ranks unlock Mastery Bonuses, including abilities you can eventually equip separately.
You don't need to master either Vision yet. Just having both equipped is enough for the upcoming story battles.
12. Once you've equipped your Visions and finished the tutorial, speak with Lasswell when you're ready to head out.
Your next main story objective is "Go to Grandshelt Castle."
Make sure Rain and Lasswell have their new equipment and Visions ready before leaving Mitra. We'll collect the remaining world-map items on the way to Grandshelt in the next section.

1.3A. Grandshelt Castle: The Burning Castle and Hell's Rider
Time to save the king. Unfortunately, Grandshelt Castle is currently doing its best impression of a giant bonfire. We've got treasure to collect, soldiers to rescue, and one very angry horseman waiting upstairs.
Before entering: Equip Tronn and Leah, bring Fire or Light for the undead, Ice or Light for Hell's Rider, and pack a few Potions, Phoenix Downs, and Antidote Herbs.
The Road from Mitra
1. Leave Mitra and follow the river east toward the rope bridge. Before crossing, check the riverbank for a sparkle containing Antidote Herb x2.
IMPORTANT: This is a different pickup from the Antidote Herb x2 collected under the bridge on the Earth Shrine-to-Mitra route in Section 1.1. Collect this second sparkle even if you already grabbed the earlier one.
Cross the rope bridge and stay on the main route.
2. On the far side of the bridge, follow the lower cliffside path to a sparkle containing Potion x2. Continue toward the wooden signpost. From the sign, take the side path along the trees toward the coast and search the dead end for a Tent. Return to the road.
3. Continue toward Grandshelt until the road forks. Take the short dead-end branch first for a Mist Potion, then return to the main path and cross the next wooden bridge.
Check the wheat field beside the road for an Ether. Before entering the capital, explore the southwestern treeline for a hidden dead-end sparkle containing Flame Scroll I x2.
4. Return to the main road and enter Grandshelt, the Royal Capital. The castle rescue sequence begins.
Castle Courtyard
5. Before entering the castle, collect both courtyard chests from the narrow paths beside the guards and Save Point:
- Left (west): 400 gil.
- Right (east): Phoenix Down x3.
Use the guards' services, heal if needed, and save before going in.
6. Enter the castle and approach the far door in the entrance hall for the scene with the wounded soldier. Charlotte joins as an automatic guest character. The objective becomes Save the King of Grandshelt.
Castle Interior: Treasure and Rescues
7. From the main corridor, take the right-hand passage past the fire blocking the central staircase. Enter the eastern room between the statues and open the accessible chest for Flame Scroll I x3. A second chest is blocked by debris; we'll deal with it later.
8. Return to the main corridor and head left (west). Defeat the Skeletons attacking the civilians. Speak to the survivors for Phoenix Down x3. Healing items harm undead, and Phoenix Downs can instantly defeat Dark Skeletons.
9. Continue to the western end and climb the broad, carpeted staircase. On the upper landing, follow its edge to the gallery above the main hall. The foreground wall conceals the connecting passage. Follow the gallery east and enter the first lounge through the northern doors. Open the chest for Flame Scroll I x2.
10. Leave through the lounge's southern opening and follow the gallery east, then turn around the far corner through the rubble-filled passage toward the next lounge. Before entering, take the staircase down from the adjacent eastern passage and open the chest for Antidote Herb x4. Return upstairs.
11. Enter the lounge and defeat the Skeletons attacking a soldier. After the scene, a Save Point appears. Heal and save; it can also connect you back to the entrance for supplies.
12. Find the wooden ladder on the lounge's northern wall, just right of the right-hand pillar. Climb up, exit onto the balcony, and follow the walkway to the room with ornate doors. Speak to the soldier inside for a Mist Potion and a warning about the monster ahead.
13. Return to the upper walkway and follow it west past the fallen soldier. Near the overturned, burning bookcase, descend the large staircase. Approaching the mounted enemy below starts the battle against Hell's Rider.
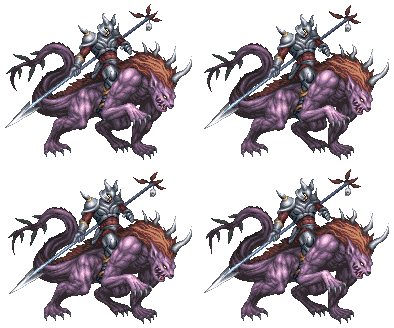
BOSS: Hell's Rider | Burning Grandshelt Castle
Battle infoDetailsType / LevelDemon / Lv. 6HP / Stagger4,000 / 200 (Normal reference)WeaknessIce
, Light
ResistanceNo elemental resistance listedAdds3 Dark Skeletons, Lv. 5, 500 HP eachBig threatSilver Lance once alone; Poi